Installation Screenshots of InstallShield 2010.
Recently I blogged about the release of InstallShield 2010 which supports Windows 7, Windows Server 2008 R2 and MSI5 with lots of new features. Today I installed the one and here are the screenshots of the installation:

Extracting the Setup file of InstallShield 2010 & preparing for starting installation.
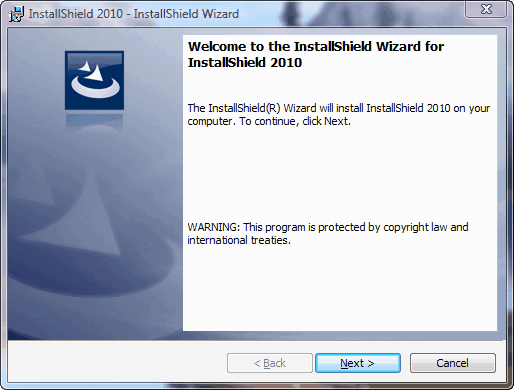
After this installation begins with user interaction.

Accept the End User License Agreement.

If you have the Serial number in case you purchased the software, just provide that or simply click on next in case you are evaluating the software.
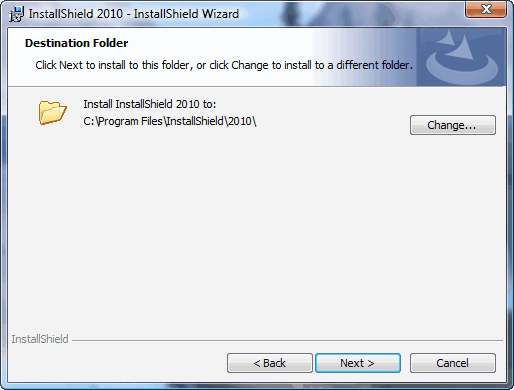
Provide the appropriate path for installation in case you want to change it else let it install at default path.
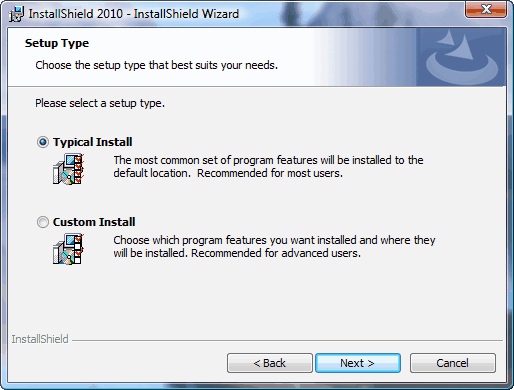
Choose the setup type either as Typical or choose custom in order to customize the installation.

Installation progresses as seen here by the green color progress bar.

Installation finished, click on Finish button.

After installation the Splash screen comes of the software.
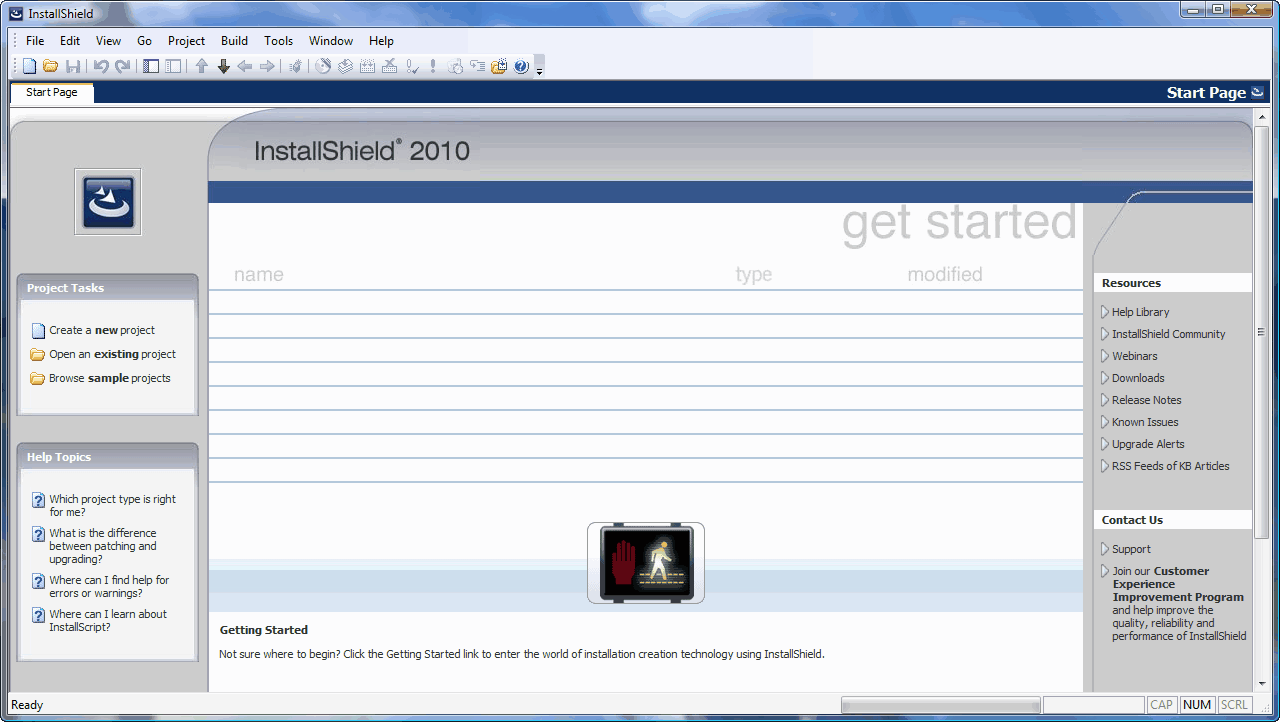
Its the UI means the User Interface were user interacts with it to accomplish his task.
This is the whole installation pprocess step by step and how the world installs software.
Extracting the Setup file of InstallShield 2010 & preparing for starting installation.
After this installation begins with user interaction.
Accept the End User License Agreement.
If you have the Serial number in case you purchased the software, just provide that or simply click on next in case you are evaluating the software.
Provide the appropriate path for installation in case you want to change it else let it install at default path.
Choose the setup type either as Typical or choose custom in order to customize the installation.
Installation progresses as seen here by the green color progress bar.
Installation finished, click on Finish button.
After installation the Splash screen comes of the software.
Its the UI means the User Interface were user interacts with it to accomplish his task.
This is the whole installation pprocess step by step and how the world installs software.

Windows Seven Enterprise edition available for download for 90 days trial.
Microsoft offers Windows 7 Enterprise 90-day trial for the IT professionals so that they can run & test the final version of it. This offer is applicable to only those who are qualified under one of the following given categories.
Partner Program
MSDN Subscriber (Developer)
TechNet Plus Subscriber
Volume License/Software Assurance customer
Before you go have a look of this:
Protect your PC and data. Ensure that backup has been taken.
Activate the product:. Activation neccessary within 10 days else system will shut down once every hour until activated.
Product key of Windows: No need of product key (it is embedded with the download).
The 90-day Trial will shut down once every hour when you have reached the end of the 90-day evaluation period.
Limited offer Download will be available through March 31, 2010, till supplies last.
After the 90-day Trial expires, if you wish to continue to use Windows 7 Enterprise, have to be purchased and then perform a clean installation of Windows 7, including drivers and applications.
Windows 7 Enterprise will be available in both tastes as 32-bit and 64-bit in five languages: English, French, German, Japanese, and Spanish.
Visit Microsoft Technet for download.
Partner Program
MSDN Subscriber (Developer)
TechNet Plus Subscriber
Volume License/Software Assurance customer
Before you go have a look of this:
Protect your PC and data. Ensure that backup has been taken.
Activate the product:. Activation neccessary within 10 days else system will shut down once every hour until activated.
Product key of Windows: No need of product key (it is embedded with the download).
The 90-day Trial will shut down once every hour when you have reached the end of the 90-day evaluation period.
Limited offer Download will be available through March 31, 2010, till supplies last.
After the 90-day Trial expires, if you wish to continue to use Windows 7 Enterprise, have to be purchased and then perform a clean installation of Windows 7, including drivers and applications.
Windows 7 Enterprise will be available in both tastes as 32-bit and 64-bit in five languages: English, French, German, Japanese, and Spanish.
Visit Microsoft Technet for download.
How to Create an Event in Windows Live Calendar.
As Windows Live Events is going to be retire, we can create Events in Windows Live Calendar with simple step by step instructions as given:
1. Go to Windows Live Calendar
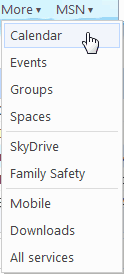
Click on New. From the pull-down menu so came select Event.

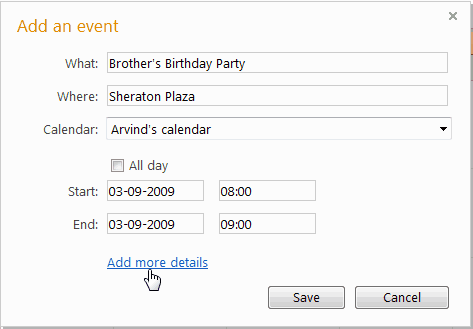
2. Now click on Add more details. Here type the details of events like What, Where, Time of event.
3. Click on Invite People and select your friends. Simply add emails of friends from the contacts list.

4. Click Send invitation. All the details of your get-together wil be sent to the invited people.

1. Go to Windows Live Calendar
Click on New. From the pull-down menu so came select Event.
2. Now click on Add more details. Here type the details of events like What, Where, Time of event.
3. Click on Invite People and select your friends. Simply add emails of friends from the contacts list.
4. Click Send invitation. All the details of your get-together wil be sent to the invited people.
Windows Live Events service ending in 2010.
Windows Live Events Service from Windows Live team is going to be retired in 2010 and starting from today onwards no new events can be created. Only accessing and editing of existing events can be done. If any one having events created on todays date then they will be available till April 2010 and in case you want to save your photos, videos then have to be done before April 2010.

Saving photos
Saving photos
- Go to http://events.live.com/ and sign in with your Windows Live ID.
- Click View your events at the top of the page.
- Click the event you want to save photos from. and then click the Photos link on the left side of the event page.
- Select the photo album that you want to save, and then click More at the top of the page. In the More dropdown menu, click Download, and then click Download with Photo Gallery.
- Select the photos that you want to save, and then click Download.
Saving files - Click the SkyDrive link on the left side of each event page.
- Select the Documents folder.
- Click the specific file that you want to download.
- Click Download, and then open the file or save it to your computer.
After April 2010 Windows Live Events will end entirely and no access to old events or to photos, videos will be avaialble. Microsoft is not planning to start a new service for events separately, but an easier way to manage and share your appointments, events, to-do lists and reminders all from one place: Windows Live Calendar. Simply click here to know How to create events in Windows Live Calendar
Subscribe to:
Posts (Atom)
Buy Quick Heal at Cheap Price


Friends




Link to us

BlogAdda

About Me

- Arvind Kumar
- I'm Arvind Kumar from India, B.Tech, now working in a MNC. I love to use Microsoft Products and learn from that. Bill Gates is my ideal person.
